
IN PROGRESS
For my thesis project, I wanted to focus on creating a modular system of stylized environments - one which was modular in both meshes and materials, using only hand-painted diffuse textures. Using only the diffuse maps served an additional purpose, as I intended to use the crystal level as an entry to the Blizzard Environment Art Contest, since I would be working on that level during the period for which the contest was active.
|
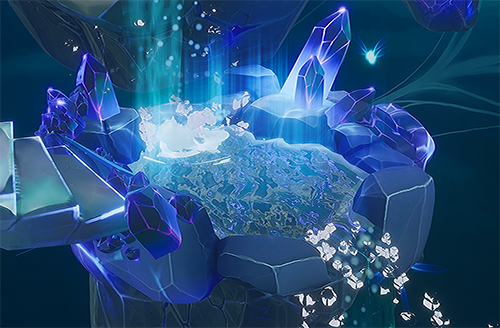
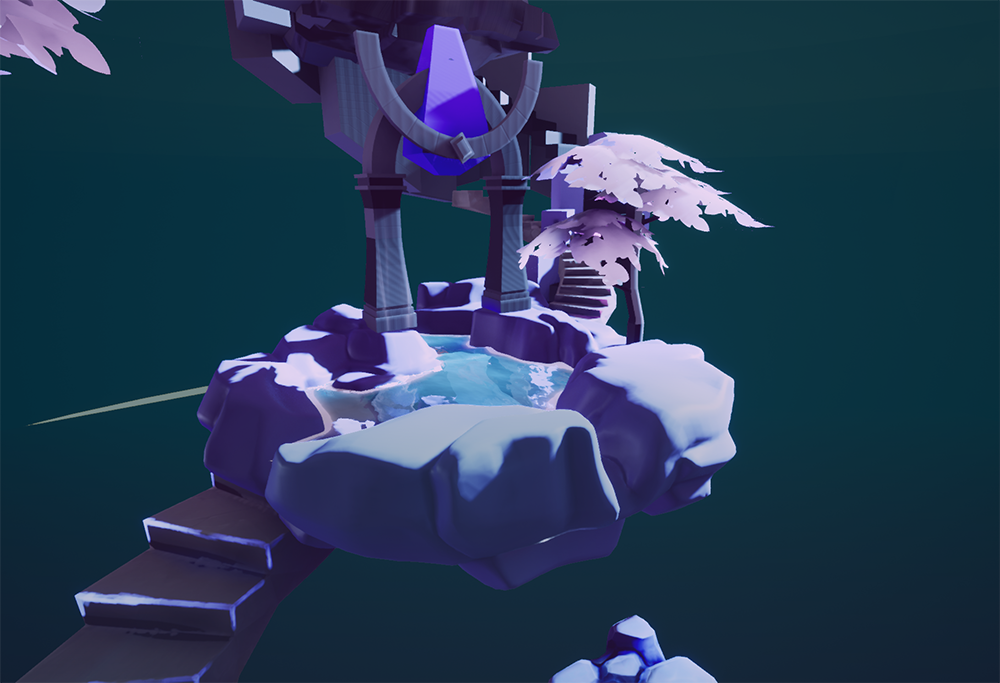
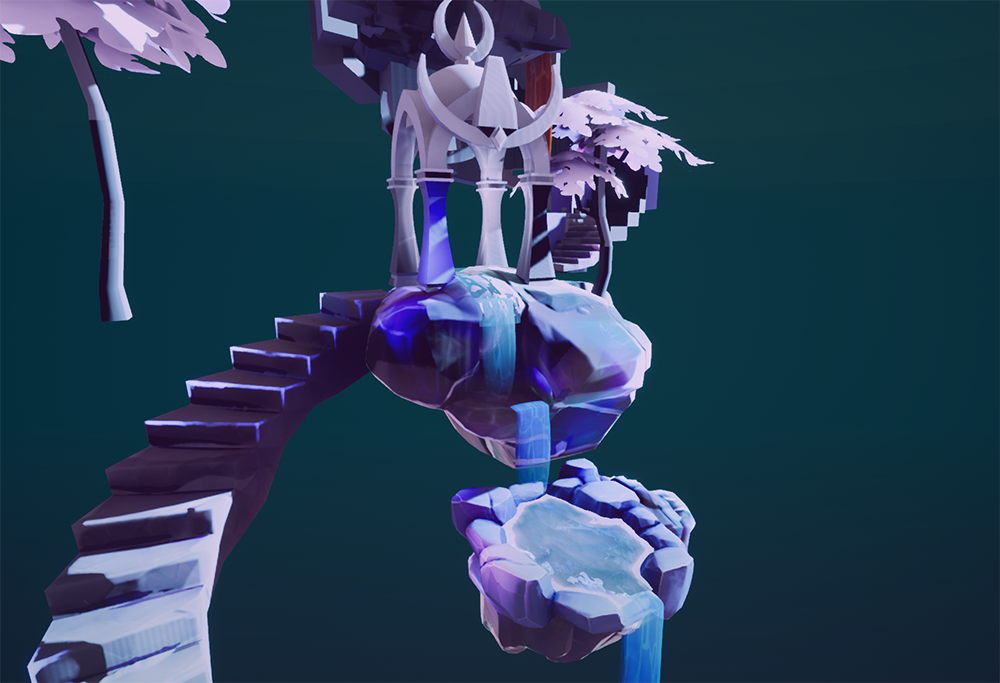
A decision I had to make early on was whether to focus on making a static scene which rendered well in still screenshots vs making a functional (from a gameplay perspective) scene with intractable and moving components which may not render as well in a static image. The water material and particles (left) are an example of this; although the still screenshot of the water pools looks overly busy and harsh, the actual materials in motion, as seen when playing through the scene, look very different. I chose to build the scene functionally rather than statically, despite the difficulty in obtaining high quality renders, because I wanted to showcase my ability to combine the different skill-sets needed to create a functional game level (blueprint creation, asset creation, dynamic material creation, particle/VFX creation) rather than simply creating a project which only displayed my abilities as a modeling/texturing artist. |


During previous team projects, I began realizing how difficult it can be for multiple artists to author different assets under a consistent style - especially when that style is not focused on realism. Often, it was easy to tell which artists created which meshes and textures. Therefore, I wanted to try and create a system which relied on very few unique textures and meshes, and instead utilized material properties to use these textures and meshes in a wide variety of ways to create visually different environments.
Additionally, I wanted the system to use robust materials which would function in engines which support a wide variety of texture nodes (such as singleplayer offline games) as well as in more constrained engines (such as online multiplayer games). This meant authoring materials so that all the effects I wanted could be achieved using only the Base Color and World Displacement inputs (or Refraction for translucent objects). For engines which might not support it, the World Displacement could also be removed with minimal impact to the end aesthetic. All translucent objects also have an opaque painted counterpart which can be switched in if translucency is too expensive.
Additionally, I wanted the system to use robust materials which would function in engines which support a wide variety of texture nodes (such as singleplayer offline games) as well as in more constrained engines (such as online multiplayer games). This meant authoring materials so that all the effects I wanted could be achieved using only the Base Color and World Displacement inputs (or Refraction for translucent objects). For engines which might not support it, the World Displacement could also be removed with minimal impact to the end aesthetic. All translucent objects also have an opaque painted counterpart which can be switched in if translucency is too expensive.
All materials in the environment draw from one of three master materials: a master opaque material, a master translucent material, and a master masked material. I split up the master materials rather than utilize one because I did not want the cost of having every object in the scene rendered as a translucent object, even if they were intended to be opaque. Metalness and specularity were faked through the use of vertex world space and the camera vector (to adjust the diffuse based on the angle that the player looks at the mesh) to reduce texture samples by not using additional maps.
Master Opaque Material
|
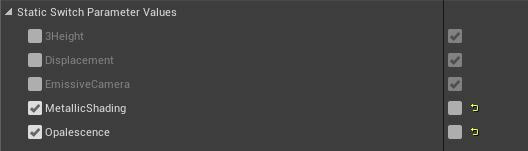
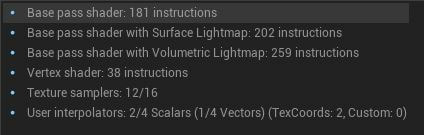
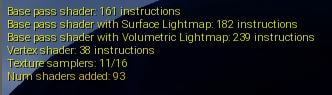
At first I set up the master materials to utilize boolean switches to toggle on/off sections of the material as needed. This made for a clean interface which was easy to read across different material instances, as I could simply collapse or expand sections on an as-needed basis. However, then I began looking into how Unreal processes booleans, and realized that by using static switches in the material, I was effectively creating multiple versions of that material - one for each different switch condition (which could be observed by comparing the shader instructions in the material instances when the switches were enabled or disabled) |
|
To keep from recomputing the shader every time I toggled the static switches, I changed the switches to lerps. For clarity, I created a set of material functions which switched the A and B inputs of the lerp, so that the true statement fed into the top rather than the bottom, and then created a version for each type of vector input. |

|

After realizing the differences between using switch and LERP functions in a material, I began looking more into how material optimization and graphics rendering works in Unreal. Although frame-rate was never a problem (running consistently at 120 FPS in editor, and 60 FPS in standalone), I wanted to create an efficient system which would run on both high end and older graphics cards, and while doing so, I wanted to be making informed decisions about how I approached the asset creation process. Even if frame-rate was not being affected, I did not want to be making something needlessly expensive.
While comparing the costs of different material functions, I also looked into the difference in cost between using a mesh with multiple materials vs a mesh with a single material and multiple UV channels. I had been using multiple UV channels out of habit, having heard that it was the accepted industry standard for mod-kit building, however I had never questioned what exactly the cost difference between the two methods was.
I found that each additional material added to a mesh incurs the cost of one additional draw-call. Therefore, the cost of 1 mesh with 2 materials was equal to the draw-calls of the mesh plus an additional 2. However, when adding additional UV channels to a mesh, each one was equivalent to slightly less than 1 draw-call, as the UV channel information is stored in the vertices, and is not read as an additional material draw. This did not change my approach to asset creation, as I was already utilizing multiple UV channels, however now I understood the reasoning behind what I was doing (rather than simply doing it "because that's what you do").
I found that each additional material added to a mesh incurs the cost of one additional draw-call. Therefore, the cost of 1 mesh with 2 materials was equal to the draw-calls of the mesh plus an additional 2. However, when adding additional UV channels to a mesh, each one was equivalent to slightly less than 1 draw-call, as the UV channel information is stored in the vertices, and is not read as an additional material draw. This did not change my approach to asset creation, as I was already utilizing multiple UV channels, however now I understood the reasoning behind what I was doing (rather than simply doing it "because that's what you do").
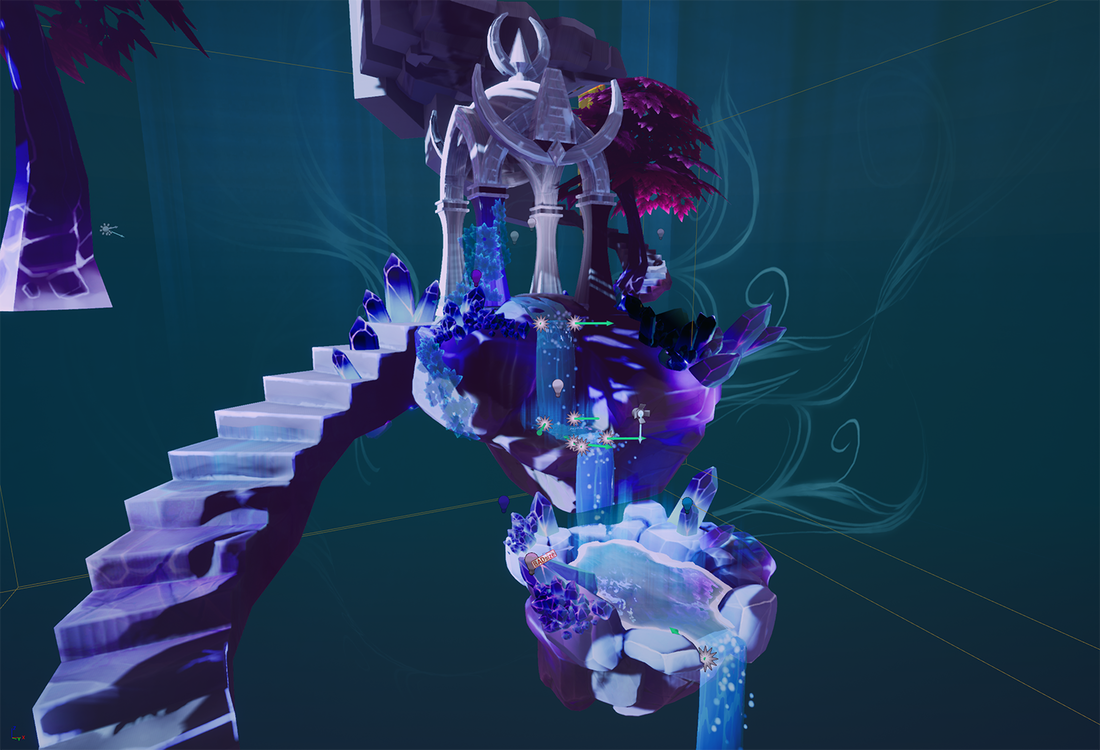
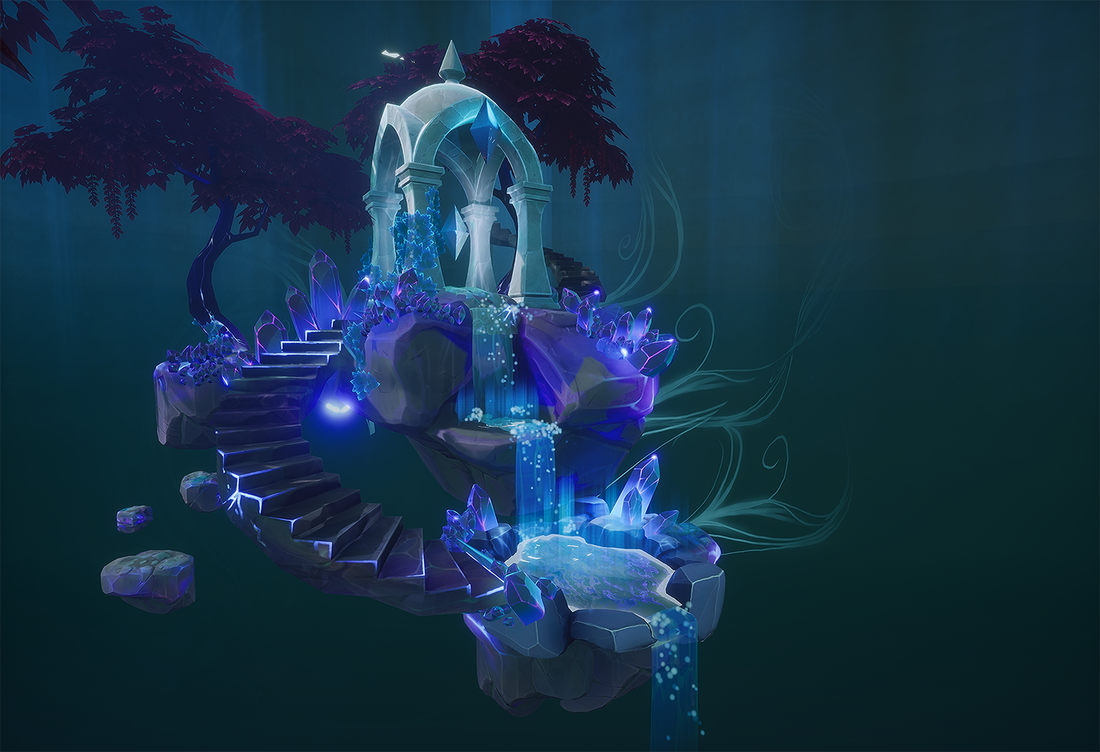
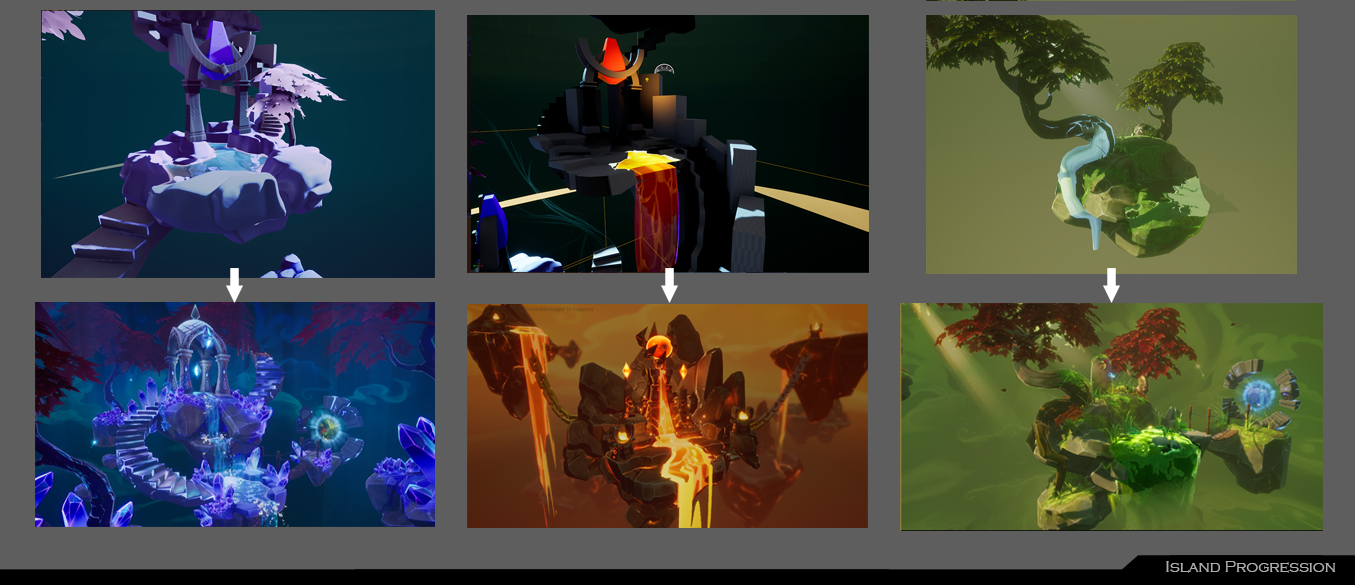
Progression of the crystal island (initial blockout, working meshes beginning texture creation, vertical slice)
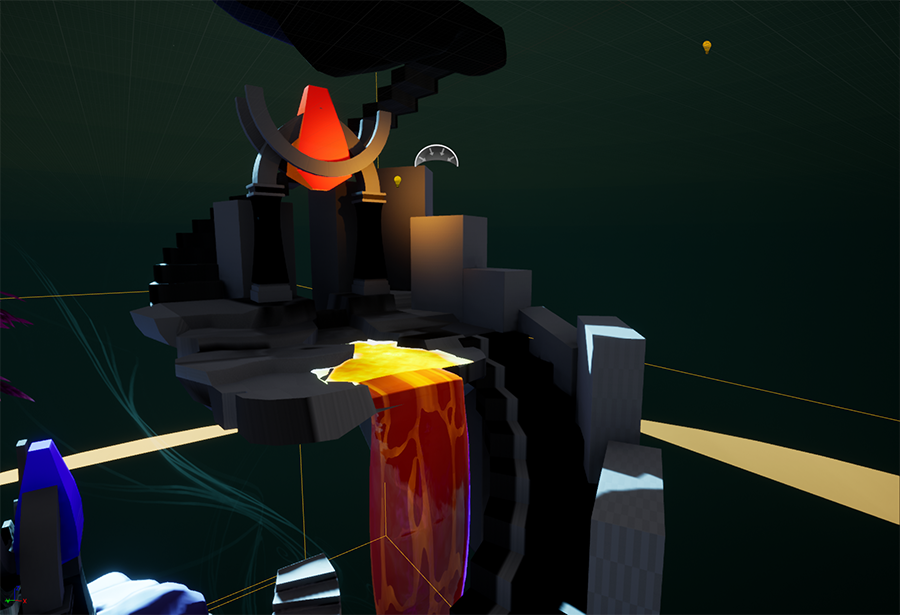
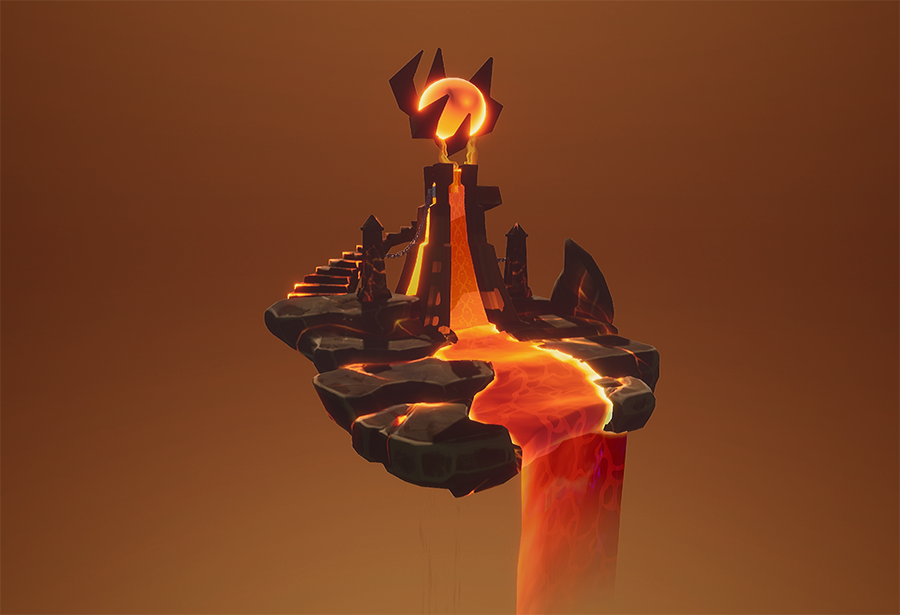
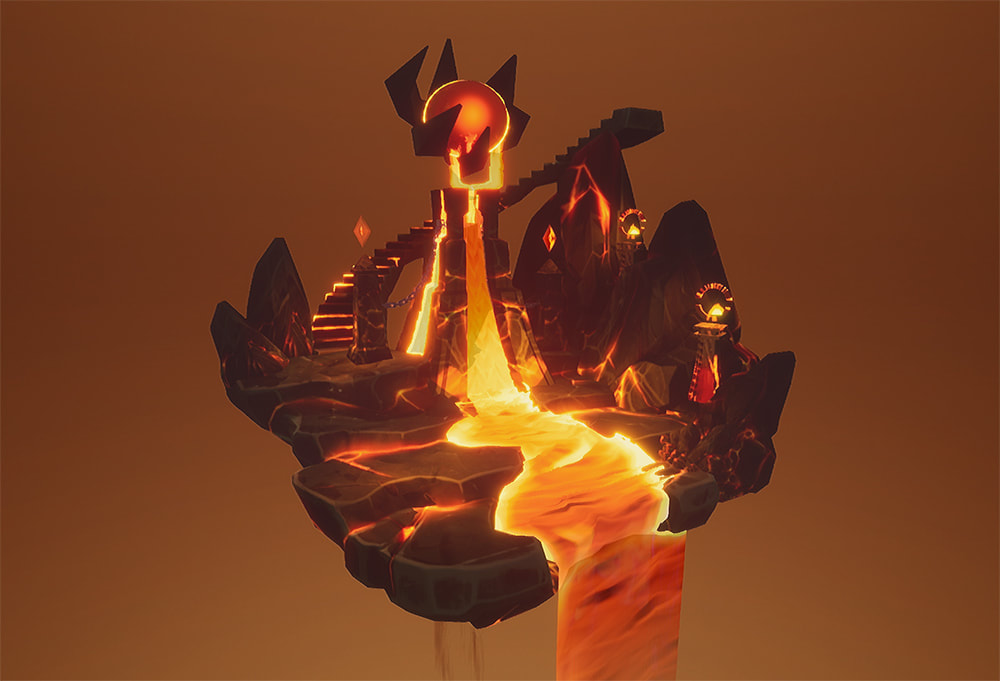
Progression of the fire island (initial blockout, working meshes)

Progression of the marsh island (initial blockout using existing assets)
What I Learned:
- Authoring one huge master material from which all materials in the scene could be instanced
- The use of camera and object position to fake the reflective effect from different maps (specular, particularly for crystalline materials)
- Using vertex colors for three-way height blending of both diffuse and uniform displacement
- Material optimization
- Level blueprint control of materials, meshes, and cameras
- Spline blueprint control for animating static meshes